My previous post, Upgrading Team Foundation Server 2008 Reports to 2010, provides a lot of information on how to upgrade reports to work with the new 2010 version of Team Foundation Server, and even though I wrote it for Beta 1, much of the information still stands. There are, however, changes that have been made since then, so in this post I’ll provide updated information that applies to Beta 2 (and hopefully the final version of 2010).
Cube Changes
There were a few breaking changes to the cube that affected our reports, which are described in the sections below. You can find more details on cube changes in Sunder’s blog post: Team Foundation Server 2010 - Relational Warehouse and Cube Schema Changes.
Measure Changes
In previous versions of the cube, there were two measure groups for work items: Work Item History and Current Work Item. Here is one example of a measure pair from those two groups:
[Measures].[Cumulative Count]
[Measures].[Current Work Item Count]
Having two measures was always a little confusing. Starting in Beta 2, there is just one measure and one measure group. The measure group is now called
Work Item, and there is a single measure that is used for both current and historical:
[Measures].[Work Item Count]
Now this measure will show historical information if you have the Date dimension included in your query, otherwise it will show current information. Much simpler. The other work item measures also follow this new pattern, with a single rather than a pair of measures for each of the work item measures.
In general, any measure that had Cumulative at the start before, just drop the Cumulative. Likewise, if it had Current at the start of the name, just drop Current. The Count measure above is, of course, an exception. Here is another example of before and after:
Before: [Measures].[Cumulative Completed Work]
After:  [Measures].[Completed Work]
That being said, there are some cases where measures with Cumulative at the start now have Trend at the end of the name. For example, [Measures].[Result Count Trend]. In general, your best bet is to look at the cube and see what the measures are called now.
Area/Iteration Hierarchies
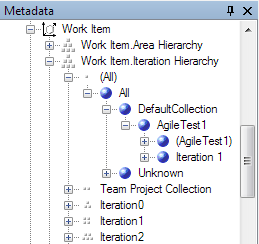
As I mentioned in the previous post, 2010 introduces team project collections (TPCs), which is a grouping of a set of team projects. Although TPCs were supported in beta 1, the TPC was not included in the area and iteration hierarchies. So if you had two projects with the same name, but in different TPCs, you couldn’t tell which areas/iterations belonged to a specific project.
To fix this, we added the TPC name as part of the area/iteration hierarchy between the root and the top-level node for the team project. As a result, we had to change all the queries that we use to get the area and iteration parameters.
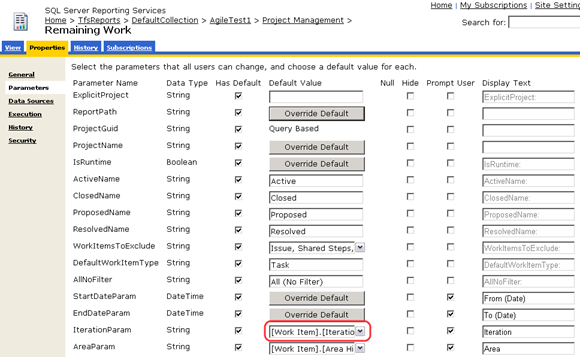
In this process of doing this, however, we also realized we could switch to a single query for each parameter instead of the two queries we had before. These new queries look a lot more complicated, but they’re actually not that bad. A bit of of explanation is in order because we also change the default value that we’re using so we can hard-code it rather than using a query. Doing this allowed us to provide a better experience when the cube doesn’t contain any areas or iterations for the team project, which will happen, for example, with a new team project that has no work items.
Here are the new default values:
|
Parameter
|
Default Value |
|
AreaParam
|
[Work Item].[Area Hierarchy].[All]
|
|
IterationParam
|
[Work Item].[Iteration Hierarchy].[All]
|
What we’re trying to do is return query results that look something like this:
|
ParameterCaption
|
ParameterValue |
|
All (No Filter)
|
[Work Item].[Area Hierarchy].[All]
|
|
(ProcessTest)
|
[Work Item].[Area Hierarchy].&[67]&[67]
|
| Iteration 1 |
[Work Item].[Area Hierarchy].&[67]&[78] |
So how do we get this? Using a few tricks:
- The All member is always returned. We use a Union function to ensure that we always return this member.
- The NonEmpty/CrossJoin near the end of this query returns all the members at the Area1 level and below. Area0 is the level of the team project, and there is a level above this for the TPC. By going directly to Area1 and all children of that level, we’re getting all the children of the project. We also cross join with the team project to ensure we only get areas for the current team project.
- The reason for the Except/Extract function is much less obvious, but it has to do with the outer Descendants function. Basically, we want to get all the first children of the project, and then all children of these members. In order for this to work when there are no matches (in which case the NonEmpty returns no members), we Union the results with the All member, but then we need to remove that member and also return only members in the Work Item dimension. That is what the combination of Extract and then Except accomplishes.
dsArea
WITH
    MEMBER [Measures].[Add Spaces] AS
        VBA.Space(([Work Item].[Area Hierarchy].CurrentMember.Level.Ordinal - 1) * 2)
    MEMBER [Measures].[ParameterCaption] AS
        IIF([Work Item].[Area Hierarchy].CurrentMember
               IS [Work Item].[Area Hierarchy].[All],
            @AllNoFilter,
            [Measures].[Add Spaces]
                + [Work Item].[Area Hierarchy].CurrentMember.Member_Caption
        )
    MEMBER [Measures].[ParameterValue]
        AS [Work Item].[Area Hierarchy].CurrentMember.UniqueName
    MEMBER [Measures].[ParameterLevel]
        AS [Work Item].[Area Hierarchy].CurrentMember.Level.Ordinal
SELECT
{
    [Measures].[ParameterCaption],
    [Measures].[ParameterValue],
    [Measures].[ParameterLevel]
} ON COLUMNS,
{
    Union(
        [Work Item].[Area Hierarchy].[All],
        Descendants(
            //
            // We use Except to remove the extra [All] member so we get the descendants
            // only of the team project.
            //
            Except(
                Extract(
                    Union(
                        //
                        // We add [All] so Extract always has at least one tuple to
                        // work with. Otherwise it produces an error when there are no
                        // tuples returned by the NonEmpty below.
                        //
                        CrossJoin(
                            [Team Project].[Project Node GUID].[All],
                            [Work Item].[Area Hierarchy].[All]
                        ),
                        NonEmpty(
                            CrossJoin(
                                StrToMember("[Team Project].[Project Node GUID].&[{"
                                    + @ProjectGuid + "}]"),
                                [Work Item].[Area Hierarchy].[Area1]
                            ),
                            [Measures].[Work Item Count]
                        )
                    ),
                    [Work Item].[Area Hierarchy]
                ),
                [Work Item].[Area Hierarchy].[All]
            )
        )
    )
} ON ROWS
FROM [Team System]
dsIteration
WITH
    MEMBER [Measures].[Add Spaces] AS
        VBA.Space(([Work Item].[Iteration Hierarchy].CurrentMember.Level.Ordinal - 1) * 2)
    MEMBER [Measures].[ParameterCaption] AS
        IIF([Work Item].[Iteration Hierarchy].CurrentMember
                IS [Work Item].[Iteration Hierarchy].[All],
            @AllNoFilter,
            [Measures].[Add Spaces]
                + [Work Item].[Iteration Hierarchy].CurrentMember.Member_Caption
        )
    MEMBER [Measures].[ParameterValue]
        AS [Work Item].[Iteration Hierarchy].CurrentMember.UniqueName
    MEMBER [Measures].[ParameterLevel]
        AS [Work Item].[Iteration Hierarchy].CurrentMember.Level.Ordinal
SELECT
{
    [Measures].[ParameterCaption],
    [Measures].[ParameterValue],
    [Measures].[ParameterLevel]
} ON COLUMNS,
{
    Union(
        [Work Item].[Iteration Hierarchy].[All],
        Descendants(
            //
            // We use Except to remove the extra [All] member so we get the descendants
            // only of the team project.
            //
            Except(
                Extract(
                    Union(
                        //
                        // We add [All] so Extract always has at least one tuple to
                        // work with. Otherwise it produces an error when there are no
                        // tuples returned by the NonEmpty below.
                        //
                        CrossJoin(
                            [Team Project].[Project Node GUID].[All],
                            [Work Item].[Iteration Hierarchy].[All]
                        ),
                        NonEmpty(
                            CrossJoin(
                                StrToMember("[Team Project].[Project Node GUID].&[{"
                                    + @ProjectGuid + "}]"),
                                [Work Item].[Iteration Hierarchy].[Iteration1]
                            ),
                            [Measures].[Work Item Count]
                        )
                    ),
                    [Work Item].[Iteration Hierarchy]
                ),
                [Work Item].[Iteration Hierarchy].[All]
            )
        )
    )
} ON ROWS
FROM [Team System]
Handling the Turkish “I”
It turns out that there are several different “i” letters in Turkish, and this creates problems with one of the queries that we had in Beta 1. You’ll need to change dsProjectGuid to use all caps for the GUID in column name:
SELECT ProjectNodeGUID FROM GetProjectNodeInfoFromReportFolder(@ReportPath)
This is to match the case of the actual column name as defined in the warehouse.
